Manage Scholiq settings
Scholiq's settings page (in-app at /apps/scholiq/settings) is short on purpose. It surfaces only the configuration an admin needs to know about: the OpenRegister register that holds the data, the EU AI Act declarations, and the RS256 key used to sign credentials.
Goal
By the end you will have confirmed the right OpenRegister register is wired up, declared any AI features Scholiq is using, and either generated or rotated the credential signing key.
Prerequisites
- Your account is in the admin group.
- The OpenRegister app is installed and enabled.
- A backup of the existing signing key if you are about to rotate it — Scholiq keeps old keys for verification, but a deliberate, dated backup makes the GDPR/DPIA story easier.
Steps
-
Open Scholiq and click Settings in the left navigation. The page is split into three sections: OpenRegister, AI Features, Credential Signing.

-
Confirm the Default register. This dropdown maps Scholiq to the OpenRegister register that holds its schemas. On a fresh install it is pre-set to the
scholiqregister imported by the app's repair step — leave it unless you are running multiple Scholiq instances against the same Nextcloud.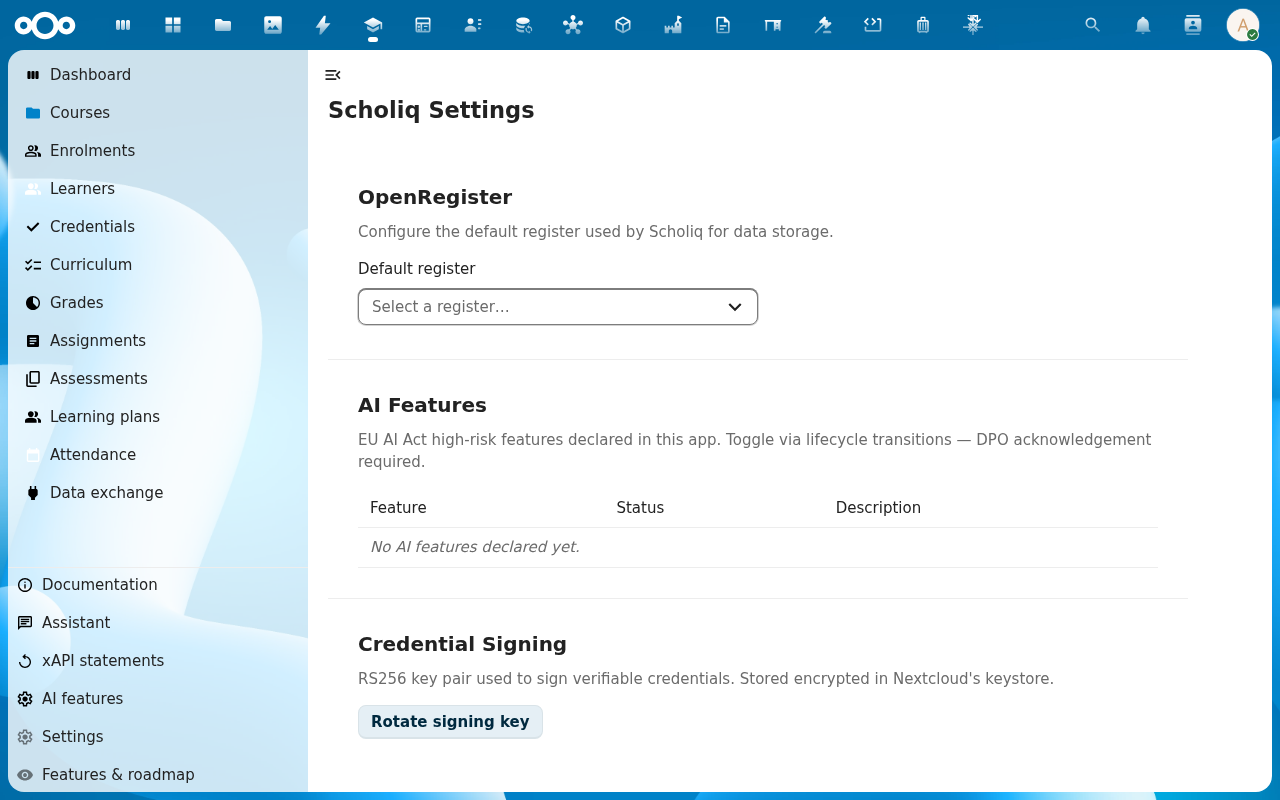
-
Scroll to AI Features. The table lists every EU AI Act high-risk feature Scholiq has declared. On a fresh install it reads No AI features declared yet — when an admin enables an AI-backed feature (proctoring, plagiarism detection, automated grading suggestion) the table fills in and shows the lifecycle state, the responsible DPO acknowledgement and the data-classes-in-scope.

-
Scroll to Credential Signing. Click Rotate signing key the first time you set Scholiq up, or whenever you need a fresh key (annual rotation, suspected compromise, post-DPO review). Scholiq generates a 2048-bit RS256 key pair, keeps the old key for verification, and notes the rotation in the audit trail.

-
After rotation, every new certificate and every new audit pack signs against the new key. Confirm by issuing a test certificate (see Issue a certificate) and visiting its public verification URL.

Verification
The settings page is healthy when: the Default register is set, the AI Features table reflects reality, and the Credential Signing section shows a Created at timestamp.
Common issues
| Symptom | Fix |
|---|---|
| Default register dropdown is empty | OpenRegister has no scholiq register imported yet — run php occ scholiq:import-register on the host, or run the app's repair step from Nextcloud admin → Overview. |
| Rotate signing key errors "keystore locked" | The Nextcloud server-side encryption keystore is sealed — an admin unseals it from the Nextcloud admin pages, then retry. |
| Verifier returns Signature does not match for old certificates after rotation | The old key is missing from the keystore — restore it from the backup taken before rotation; Scholiq logs the Public-key fingerprint of every key it has ever used in the audit trail. |
Reference
- Run a compliance-training audit — uses the same signing key.
- Issue a certificate — same key, learner-facing flow.
- Set up your school structure — the structure the settings page assumes you have.